Starship est un prompt « cross-shell », amélioré, ultra-rapide et personnalisable.
En cherchant comment personnaliser l’affichage de mon shell dans différente conditions, je suis tombé sur starship qui présente de nombreux avantages:
- multi-shell
- compatible avec WSL
- personnalisable
- performant, avec un faible impact sur les ressources
L’installation est on ne peut plus simple et est décrite sur la page de documentation. Ci-après, je décris comment l’installer sous n’importe quelle distribution Linux WSL (Debian dans mon cas):
- Lancer le script d’installation :
1curl -sS https://starship.rs/install.sh | sh
- Ajouter la ligne suivante à la fin de ~/.bashrc
1eval "$(starship init bash)"
- Recharge la config bash:
1source ~/.bashrc
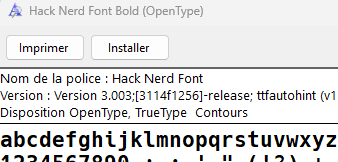
Starship est maintenant installé. Vous l’aurez remarqué, l’affichage est un peu « buggé ». C’est normal, il faut encore ajouter une Font supportant les icones. Pour ça, il y a l’excellent site nerdfonts.com. Dans mon cas j’ai choisi le « Hack Nerd Font ». L’installation est on ne peut plus simple:
- Télécharger le font (sous Windows)
- Ouvrir les fichiers polices souhaités et clicker sur « Installer

Il reste deux étapes importantes à effectuer pour avoir un prompte hyper pratique:
La première, il faut configurer la police installée dans le Terminal Windows: Paramètre -> Debian -> Apparence

La deuxième étape, il faut customiser starship. Ca s’effectuer en éditant le fichier ~/.config/starship.toml.
Exemple de ma configuration (attention, les icônes ne seront pas reprise correctement car la police n’est pas installée sur ce site, il faut les adapter selon votre besoin. Ce fichier se trouve également sur mon repo Github
2
3
4
5
6
7
8
9
10
11
12
13
14
15
16
17
18
19
20
21
22
23
24
25
26
27
28
29
30
31
32
33
34
35
36
37
38
39
40
41
42
43
44
45
46
47
48
49
50
51
52
53
54
55
56
57
58
59
60
61
62
63
64
65
66
67
68
69
70
71
72
73
74
75
76
77
78
79
80
81
82
83
84
85
86
87
88
89
90
91
92
93
94
95
96
97
98
99
add_newline = false
command_timeout = 1000
format = """$os$username$hostname$kubernetes$directory$git_branch$git_status"""
# Drop ugly default prompt characters
[character]
success_symbol = ''
error_symbol = ''
# ---
[os]
format = '[$symbol](bold white)'
disabled = false
[os.symbols]
Windows = ''
Arch = ''
Ubuntu = ''
Macos = ''
# ---
# Shows the username
[username]
style_user = 'white bold'
style_root = 'black bold'
format = '[$user]($style)'
disabled = false
show_always = true
# Shows the hostname
[hostname]
ssh_only = false
format = '@[$hostname](bold yellow):'
disabled = false
# Shows current directory
[directory]
truncation_length = 10
truncation_symbol = '…/'
home_symbol = ' ~'
read_only_style = '197'
read_only = ' '
format = '[$path]($style)[$read_only]($read_only_style)> '
truncate_to_repo = true
# Shows current git branch
[git_branch]
symbol = ' '
format = '\([$symbol$branch]($style)\)'
# truncation_length = 4
truncation_symbol = '…/'
style = 'bold green'
# Shows current git status
[git_status]
format = '[$all_status$ahead_behind]($style) '
style = 'bold green'
conflicted = ''
up_to_date = ''
untracked = ' '
ahead = '⇡${count}'
diverged = '⇕⇡${ahead_count}⇣${behind_count}'
behind = '⇣${count}'
stashed = '$ '
modified = ' '
staged = '[++\($count\)](green)'
renamed = '» '
deleted = '✘ '
# Shows kubernetes context and namespace
[kubernetes]
format = 'via [ $context\($namespace\)](bold purple) '
disabled = true
# ---
[vagrant]
disabled = true
[docker_context]
disabled = true
[helm]
disabled = true
[python]
disabled = true
[nodejs]
disabled = true
[ruby]
disabled = true
[terraform]
disabled = true
Une fois le fichier starship.toml, la prochaine ligne de shell sera directement à jour avec la configuration.
Quelques exemples du résultat dans le Terminal (j’ai masqué mes info host/machine):


La dernière étape consiste à configurer VSCode pour supporter l’affichage. Comme pour le Terminal, il faut lui préciser la police à utiliser, sans quoi, les icônes ne seront pas affichées:

Dans settings.json, ajouter les configurations suivante, selon vos préférences :
2
"terminal.integrated.fontSize": 12
Voilà VSCode configurer avec starship dans le terminal WSL. La méthode s’applique dans d’autres terminaux également ce qui permet de retrouver une uniformité entre différents shell avec un niveau élevé de personnalisation assurance un gain en productivité